
The idea of a photography studio might conjure images of expensive lighting rigs, seamless paper backdrops, and a room dedicated entirely to shooting. The reality for most bloggers and content creators is a kitchen table, a spare corner, or a spot next to the best window in the house.
That’s completely fine, because a great DIY phone photography studio isn’t about the space. It’s about controlling three things: your light, your background, and your surface. Get those three right, and you can create professional-looking images from virtually anywhere in your home.
Most people put this off assuming it requires more space, more equipment, or more money than they actually have. It doesn’t. You can build a functional home studio for free today then once you see how easy it is to get great results, you’ll know exactly what’s worth investing in next.
This guide walks you through how to set one up at every budget level, from completely free to a modest investment that will serve you for years.
IN THIS GUIDE
Why a Dedicated Studio Space Is Worth Having
Consistency is one of the most underrated qualities in business photography. When your product photos, blog images, and social content all feel visually cohesive, your brand looks intentional and trustworthy, even if you’re a team of one.
A dedicated shooting space, however small, makes that consistency achievable. When your setup is already in place, you’re far more likely to actually shoot rather than talk yourself out of it because it feels like too much effort to get everything ready.
Even a small, semi-permanent setup in a corner of a room makes a real difference to how often you shoot, and consistency of output matters more to your brand than occasional perfect photos.
The Three Elements of a DIY Studio
Every functional photography studio — professional or DIY — is built on the same three elements:
- Light – your primary light source and how you control it
- Background – what appears behind your subject
- Surface – what your subject sits on or in front of
Get these three working together and everything else is a bonus.
Setting Up at Every Budget Level
The Free Setup – Use What You Already Have
You don’t need to spend a single dollar to create a functional home studio. Here’s how to build one from what you almost certainly already own.
Light: Your best window
Find the window in your home that receives the most consistent, indirect daylight. A cloudy day gives you the softest, most flattering light. Position your shooting surface directly in front of or beside the window so light falls onto your subject from the front or side.
Turn off every other light source in the room before you shoot. Mixing light sources — a lamp plus a window, or overhead lighting plus daylight — creates color casts that are difficult to fix in editing.
Want to go deeper on getting the most from natural light? The Best Natural Lighting Tips for Smartphone Business Photography
Background: A plain wall or large sheet
Look around your home for a clean, uncluttered wall in a neutral color (white, grey, or a soft tone) that complements your brand. If your walls aren’t suitable, a large sheet from your linen cabinet works beautifully as an instant backdrop.
Surface: A table, desk, or the floor
For flat lays and product shots, a clean table surface is all you need. A wooden dining table, a white desk, or even the floor itself can work well depending on the look you’re going for.
Reflector: A sheet of white card or foam board
Place a sheet of white card on the opposite side of your subject from the window. This bounces light back in and fills shadows without adding another light source. It’s one of the most effective techniques in photography and costs almost nothing.
The Low-Cost Setup
Once you’re comfortable with the free setup, a small investment in a few key pieces can significantly expand what you’re able to shoot. Especially in lower light or for more consistent results across sessions.
Mini tripod
A small flexible tripod eliminates camera shake entirely and frees up your hands for arranging products or adjusting props. It also lets you get into the shot yourself for personal branding photos without needing someone else to hold the camera. Look for one with a phone mount included.
I’ll be sharing my top tripod recommendations for phone photography in a future post – coming soon.
Foam board backdrop
A sheet of white foam board from a craft or art supply store gives you a clean, seamless background that works for almost any subject. It’s lightweight, easy to store, and can be propped against a wall or laid flat as a shooting surface. Pick up a black one too — switching between white and black backgrounds instantly changes the mood and feel of your photos.
Daylight bulb for evening shooting
A daylight-balanced bulb (5000K–6500K) fitted into a standard desk lamp gives you a reliable light source for evening shoots when window light isn’t available. Position it at 45 degrees to your subject, roughly at the same height, to mimic the angle of natural window light.
The More Invested Setup
If photography is a significant part of how you run your business, and you want to do regular product shots, content batching sessions, plus video alongside stills, then a modest additional investment will noticeably level up your results and make your setup faster and more reliable.
Ring light
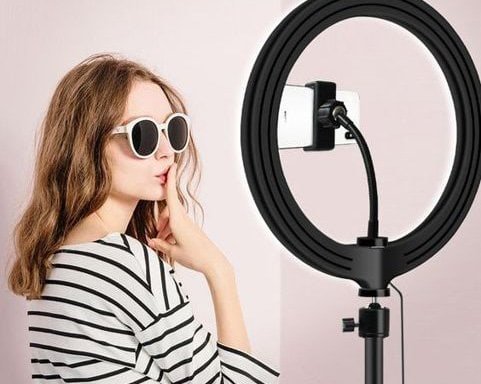
A ring light produces soft, even, circular light that’s particularly flattering for portraits, headshots, and video content. Most come with an adjustable stand and a phone mount, making them a versatile addition to a home studio setup. Look for one with adjustable colour temperature so you can switch between warm and cool light depending on your subject.
I’ll be rounding up a selection of the best ring lights for phone photography in a future post.
Clip-on phone lens
A macro clip-on lens lets you get significantly closer to your subject than your phone camera can manage on its own, revealing fine detail in products, textures, and close-up shots. A wide-angle clip-on lens is useful for shooting in tight spaces or capturing more of a scene without stepping back.
I’ll be covering the best clip-on lenses for phone photography soon.
Backdrop stand with paper or fabric roll
If you shoot regularly, a small collapsible backdrop stand with a roll of seamless paper or fabric gives you a professional-looking background that’s quick to set up and easy to change. Available in a range of colors, they’re particularly useful if your brand requires a specific background color across all your imagery.

Your DIY Studio Checklist
Before every shoot, run through this quick checklist to make sure your setup is ready:
- Light source identified and positioned: window, lamp, or ring light
- All other light sources in the room switched off
- Background clean, wrinkle-free, and free of distractions
- Shooting surface clean and ready
- White card reflector in position on the opposite side from your light source
- Phone mounted on tripod or stable surface
- Test shot taken and checked before the main shoot begins
Things Worth Knowing Before You Invest
Start with what you have. The free setup described above is genuinely capable of producing professional-looking results. Get comfortable with it before spending anything — you’ll make much better purchasing decisions once you understand what your actual limitations are.
Your space doesn’t need to be permanent. Even a semi-permanent corner setup that takes five minutes to clear away is enough. The goal is reducing the friction between you and actually picking up your phone to shoot.
One good light source always beats several mediocre ones. Resist the temptation to add more lights to solve a lighting problem. Most issues with artificial light come from using too many mismatched sources, not too few.
Want to get more from your studio setup? Read the full guide: Phone Photography for Beginners: A Practical Guide for Bloggers & Small Business Owners.
And if you haven’t sorted your camera settings yet, pair your new studio setup with the right settings for even better results.